Showing posts with label baking. Show all posts

Wednesday, February 22, 2017

Swedish bread update

After my trip to Sweden I'm interested in recreating the delicious brown bread I had several times there. I talked a bit about it in a recent post.

I've made two attempts so far, but I'm not there yet! Both were edible, the second more so than the first.

In the first, I used the crazy rose hip meal (or whatever it is) that I brought back. It's ... weird. Very red in color, and very vitamin-C-like in flavor, if that makes sense. I don't think I'm going to use it in further attempts, unless I get a lot closer to the ideal and am in tweaking mode.


You can see the redness of the meal in the finished product.


The second attempt was better - it tasted pretty good and was rather hearty-seeming: 

But the attempts so far haven't even BEGUN to match the real thing, or even the photos in the recipes I used. (Here's a link to the recipe I used as a starting point for the first attempt. The second attempt came from The Rye Baker: Classic Breads from Europe & America, which I got from the library)

Obviously I'm not using the right flour, so my next step is to get my hands on dark rye and/or pumpernickel flours. Fortunately I'm in driving distance of Bob's Red Mill - and they sell in bulk, so I can buy a few cups, not a few pounds of flour while I'm in test mode! 

One good thing is that I've been scaling these recipes WAY down - I think I calculated them down to an eighth of the original volume. I've been making 3-4 muffins with each attempt. Thank goodness for digital scales and recipes written in grams! 

Wednesday, February 8, 2017

Swedish goodness

Sweden was awesome! No surprise, I suppose, since it WAS vacation after all. It's a great place to visit - everyone spoke excellent English, it was easy to get around, heck, my cell phone even got data service there! (Thanks, provider!)

One thing I loved was the breakfast buffets - lots of delicious food, usually included in your lodging cost. My boyfriend and I would usually eat a hearty breakfast, skip lunch, have a late afternoon snack and then have dinner.

I have come back vowing to recreate the bread I found at every breakfast offering. It's dark, but not dry or heavy. It's got some nuts or seeds in it but no heavy flavoring. I've found some recipes that call for orange or anise or fennel and I'm certain the ones I had didn't have those elements - some posts hint that's a Christmas-related flavoring choice.


At one place I cleverly took a picture of the label, so I would know the ingredients involved when looking for recipes.


The above label indicates it's bread made with filmjölk, or sour milk. I have a friend in Sweden (who we didn't get to see) who tells me it's sort of like a cross between buttermilk and yogurt; they always have it on hand for their kids to drink. He even made a little video as he poured it into a glass so I could get a sense of its density!

I've tracked down some recipes for "sour milk bread" and also found this post for so-called Kavring, or dark rye bread. It calls for plain yogurt and a little milk or cream if the dough is too thick, so I think that is her attempt at substituting for the sour milk ingredient used in Sweden.

There are two more odd ingredients on that label: one is mörk sirap - aka dark syrup. Apparently it's kinda like dark corn syrup, sorta like molasses crossed with light syrup.. on that I took no chances. I bought a bottle and brought it home.

The final mystery ingredient is nyponskal. Here, I'm sorry to say, the internet has not been helpful, nor has my friend. The best I can find that this is rosehip husk... it can be used in soup. I'm thinking it's kind of a ... bran-like thing? Anyway I bought a bag of what seems to be rosehip meal.. so I will try that and see if it works.

I'm going to construct a recipe that mainly follows the Kavring one but has some additional elements, and will sub in my best guess at the Swedish-specific options.

Stay tuned!


Wednesday, October 7, 2015

Pomegranate goodness!

I know, I've been HORRIBLY lax! It's been a super busy year - I got a new job that requires a lot more focus and brainpower than my last one did: I traveled less and worked more and cooked less and all in all - not a lot of blog-fodder.

But, I was going to a ladies' dessert & drinks night this past weekend, and I was trying to think of something seasonal, and appealing, and easy, and not too dish-intensive. (what has become of me? so sad!)

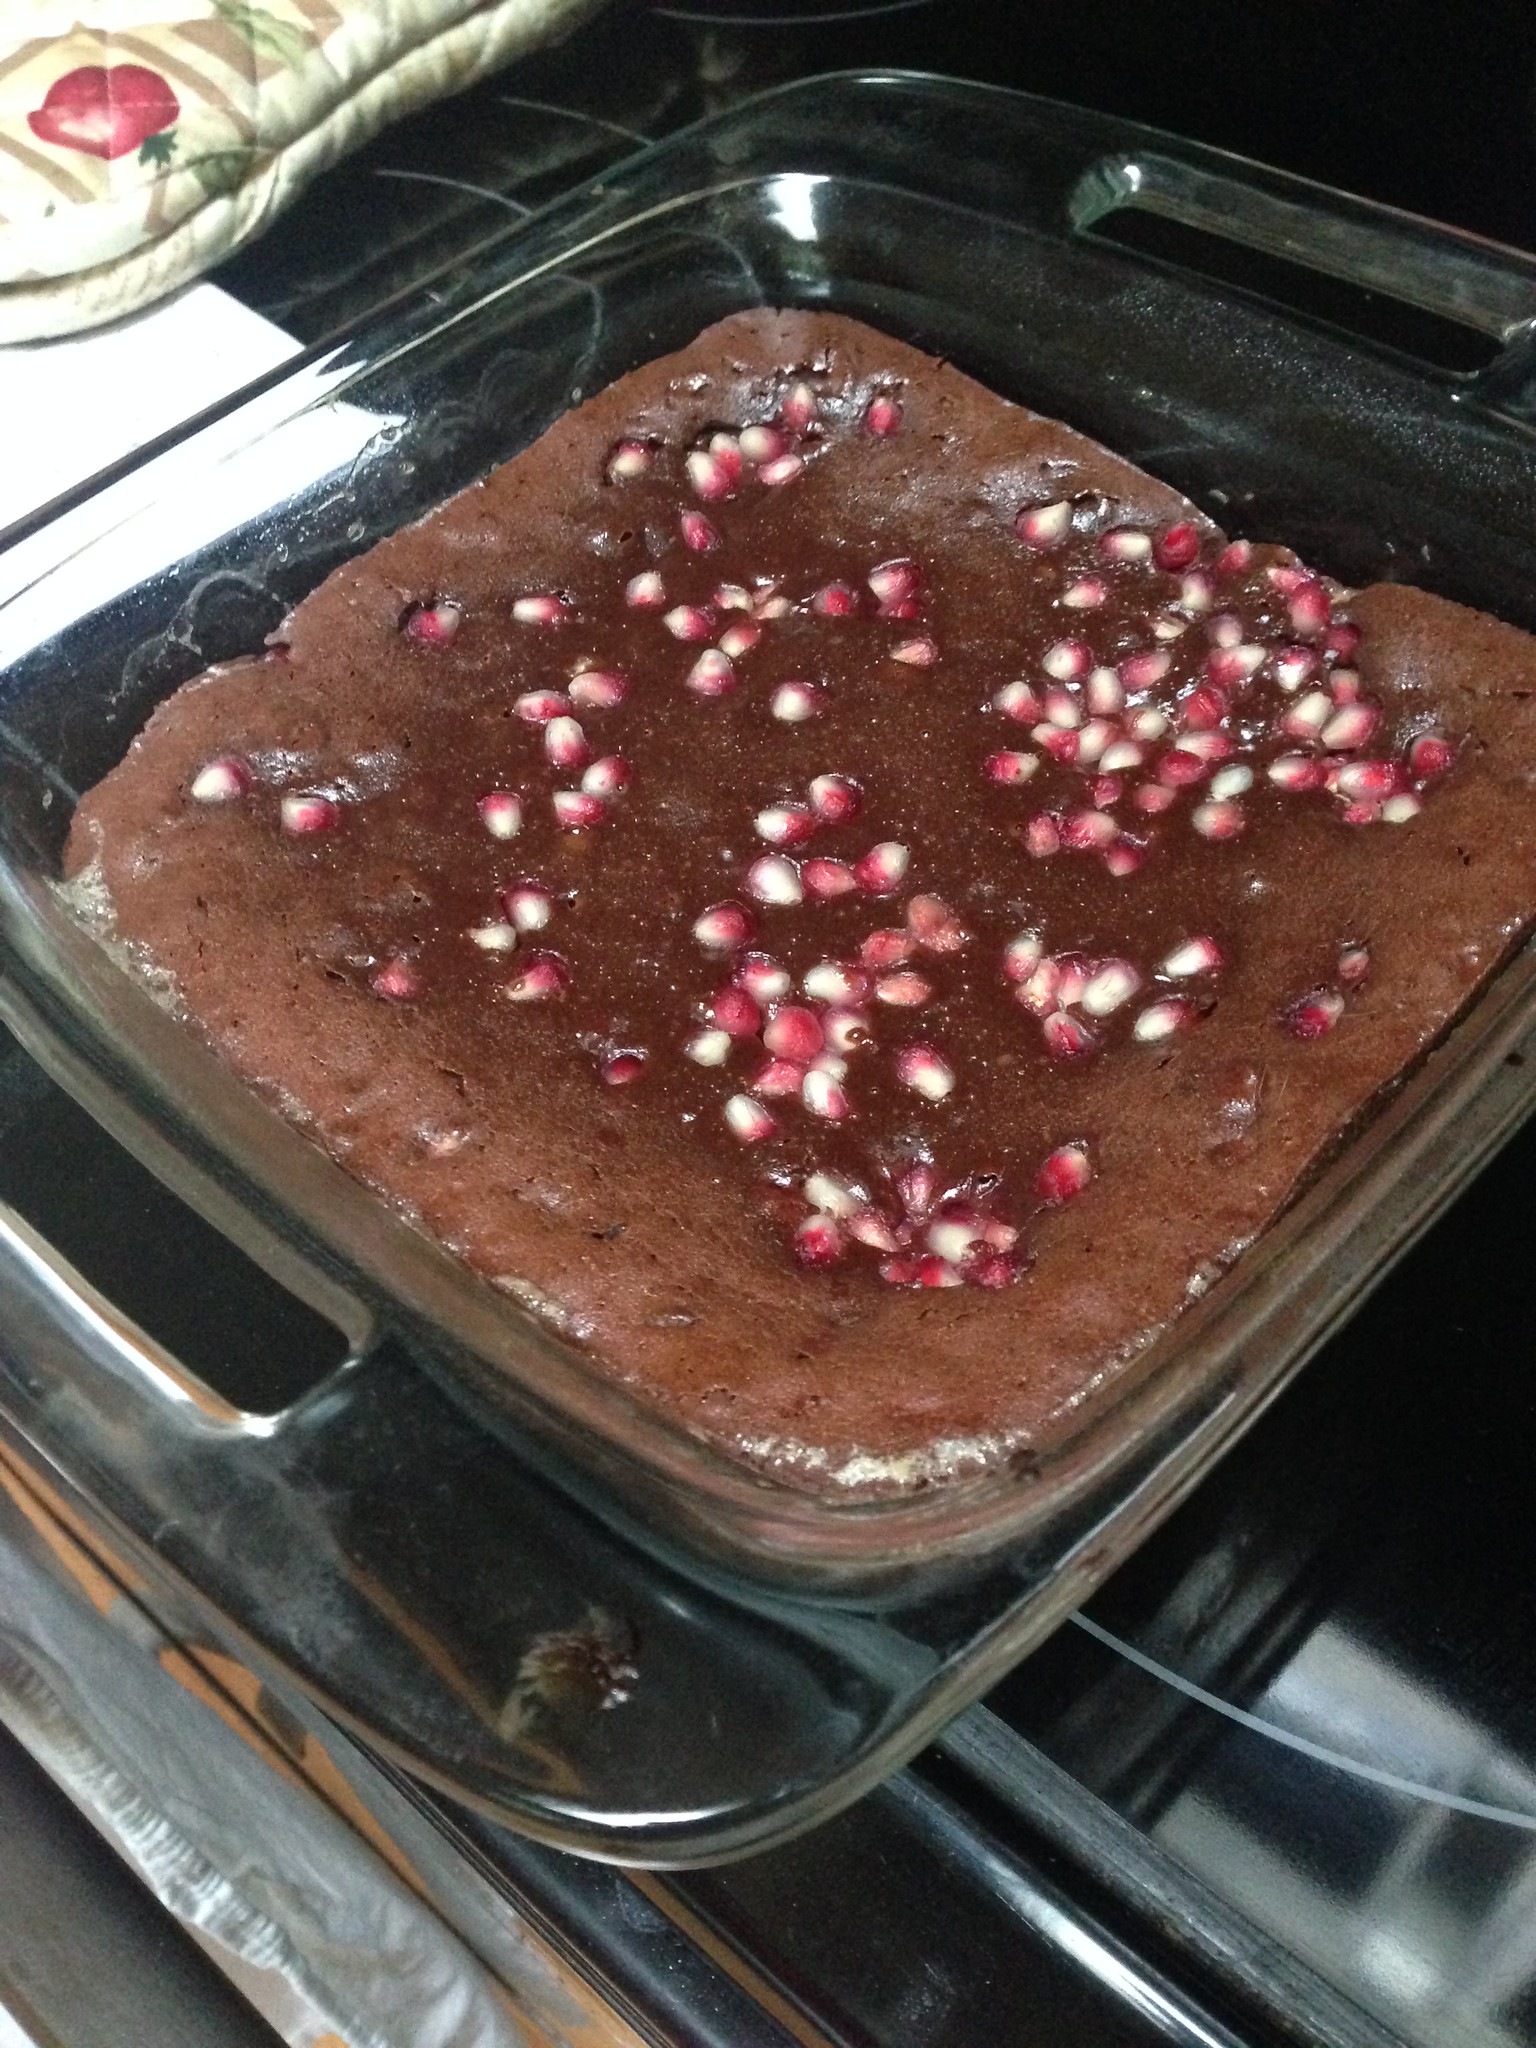
Out of nowhere I recalled that I'd seen pomegranates at the grocery store, and I wondered if anyone had put them in brownies before? I turned to the internet and indeed they had.


Very easy recipe:
A. melt together: 170g dark chocolate, 70% and 1/2 cup butter
B. while that cools, whisk together: 3 eggs, 1 cup white sugar, 1 tsp. vanilla, 1/2 tsp. salt
C. stir A into B, then stir in 1/2 cup all purpose flour
D. Finally, stir in MOST of the seeds from 1 pomegranate - reserve about 1/4 c  (see note below about seeding a pomegranate). Then you sprinkle the rest of the seeds on top and push them in a little. I should have been more careful about where I sprinkled mine, but oh well!

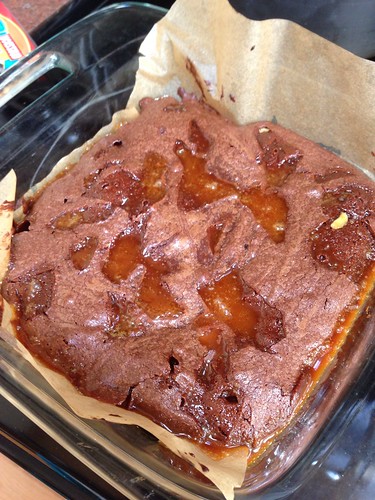
Put the batter into a prepared pan (sprayed or parchment paper-lined or greased/floured) and bake at 350 for 30-40 minutes. Mine came out more fudgey than cakey and I possibly should have baked them a bit longer, but oh well. I'd done a 9-inch square pan and thought since they were skinny they might be getting dry inside... nope!

I had a bunch of the brownies left over, unfortunately - mine were among three other brownie-type dishes brought to the event. Next time I will be more creative!

Note: While I was at that internet searching business, I watched a video about how to seed pomegranates. I find it really annoying that so many blogs are turning to video content (I just want to read!!!) but I did watch a video for this technique, and then I tried it. It works! You cut the pom in half, pull the edges apart to loosen up the pith a bit, turn the half upside down over a bowl, and smack it repeatedly with a large wooden spoon. This seems to shake the seeds loose from the pith without making a giant splattery mess.

Wednesday, July 3, 2013

Easiest summer dessert ever

I wanted to make a summery dessert to bring to a pot luck; I found a recipe for roasted apricots with honey mascarpone, and decided to make it. But as per usual, I tweaked it some! I needed to scale up the recipe, and mascarpone is expensive, so I bought a good-quality Greek honey yogurt instead.

So:
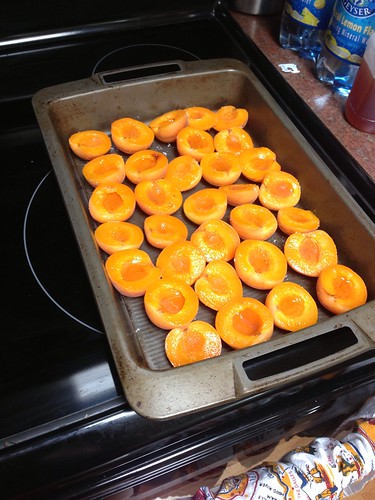
Cut a bunch of apricots in half, dip the cut face into some sugar, and place cut side up in a shallow pan:
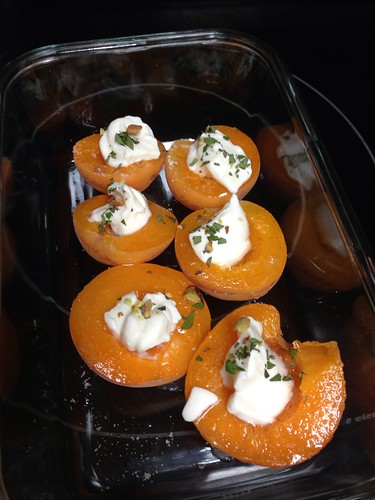
Broil for a few minutes, until the sugar starts to brown a bit. Remove from the oven, dollop the honey yogurt into the center of each, and sprinkle with toasted pistachios and chopped lemon verbena:
 Summer in a mouthful!

Wednesday, June 5, 2013

Salted Caramel GENIUS

I've had this recipe for salted caramel brownies bookmarked for ages - well, for four months, I guess. I initially thought I'd make it for my housewarming party, but I ran out of time. Fortunately, a friend had her birthday yesterday and I was in the mood to bake!

I got up early to make the caramel before work.
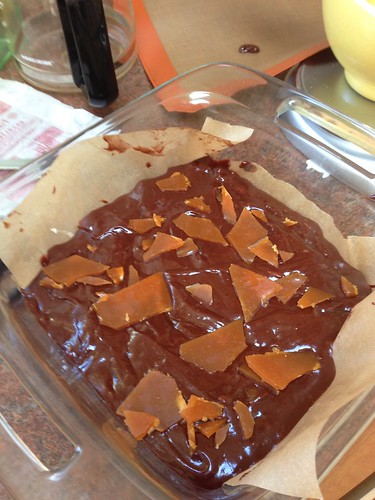
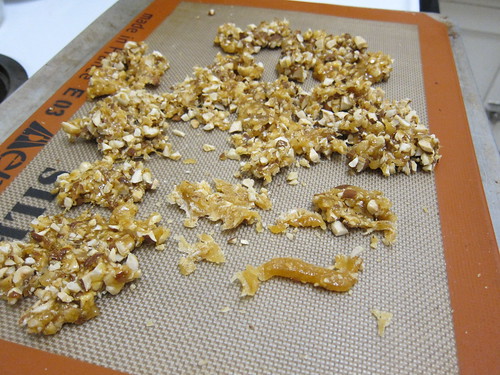
Oh MAN it was so easy, and came out looking great. I did make a slight mistake, as I poured it a bit too thin. I didn't notice that in her example, she poured it into a plate and let it get a little deep. I think the thicker caramel bits would have resulted in more-noticeable in-brownie caramel pools, but I assure you, it didn't suck as it was.

Anyway, during my lunch break I made the brownie batter and stirred the caramel shards in; I sprinkled some on top as directed in the recipe:
The results were gorgeous:
I followed the directions to freeze them before cutting (and then had to thaw a bit), and it was a good idea. The room-temp results are dense and amazing, but quite sticky.
They were very popular at the birthday outing! They're so rich, and the guests were so restrained, the birthday girl even got to take half of them home.

Of course I didn't give them ALL to her... I've found they go very well with coffee.

Friday, May 10, 2013

Granola

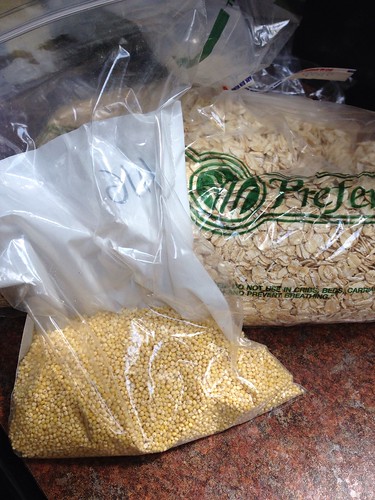
My sister has been making lots of granola while staying with me, and I think the absolute best ingredient we've discovered is millet. It's a tiny round grain that adds a really nice crunch. It's easy to buy from the bulk section in the grocery stores here:
Tonight it's my turn to make the granola! I'll be making up my own recipe, borrowing liberally from others on the internet:

I'm intrigued at the idea of adding quinoa, and I like the idea of using fruit puree instead of lots of oil. I also like the flavors of coconut and nuts and some spices. I think I'm going to try:

2 cups oats
1/2 cup millet
1/2 cup quinoa
1/4 cup wheat germ 
3/4 cup unsweetened coconut
1 cup nuts (half walnuts, half pecans, is what is currently on hand)
1 pureed banana
1/4 cup melted coconut oil
1/4 cup agave nectar or honey, if the banana isn't very sweet
1 tsp vanilla extract
1/4 tsp ground cloves
1 tsp cinnamon
pinch salt

Toast at 300 for ~30 minutes, stirring every 10 minutes to get it crispy, but not burned. 

We'll see a) how well I stick to the recipe and b) how it comes out.


Thursday, February 14, 2013

Pi day approacheth

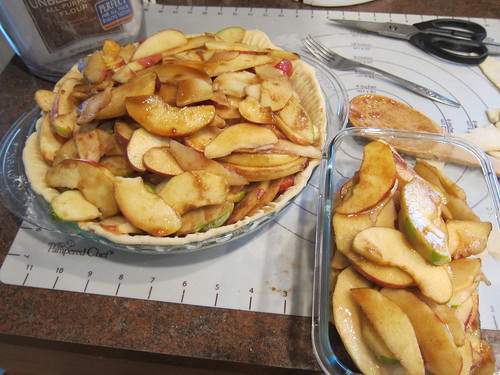
Okay, it's a month away, but it's never too soon to start thinking about celebrating pi day! I made a classic this past weekend. Make an all-butter crust, then peel and thinly slice at least six different varieties of apples (I used pink lady, gala, granny smith, red delicious, and I forget what else). Stir some flour, cinnamon, sugar and lemon juice into the apple slices, and pour them into the crust.

Don't panic if you have too many - just bake a secondary dish of apple slices!

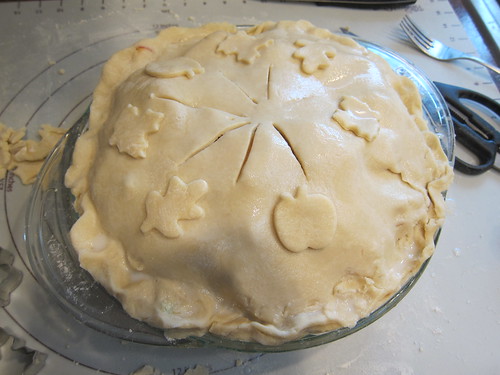
Drape the top crust on, and take a little time to embellish it if you can: 


I promise you can taste the love all the way to the last slice eaten for breakfast the next morning:


  For a different slice of pie, and to solve the bonus clue, follow this recipe:
Ingredients:
1. The first ten digits of π.  They are: 3.141592653...
2. These 10 operations: - x + + x + ÷ + + -
3. The green 10 number sequence on your Mission Narus card.

Recipe:
1. Start with the first digit of π.  Apply the first operation to the first digit on your card. (In this case, 3 - first # on card = ?)
2. Convert this number to its alphabetic equivalent.

Repeat for the 2nd digit of π/2nd operation/2nd # on card.
When complete you'll have a 10 letter word.  Text this word to Mission Control.
Eat more pie!


Thursday, January 31, 2013

Chez Panisse Almond Tart

I really love a challenge in the kitchen, particularly in the dessert arena, so I'm always happy to bring dessert to a dinner party or potluck. Last weekend I was invited to a friend's for a French-themed dinner and wine tasting, and she suggested I bring some sort of tart. I wasn't inspired by anything I found in my cookbooks, so I turned to some of my online favorites.

As usual, David Lebovitz came through. I have (and love, and have heavily bookmarked) his Ready for Dessert but his blog is also a major source of inspiration. When I read his recipe for the Chez Panisse almond tart, I couldn't resist it. Chez Panisse was founded in Berkeley in the early 1970s and is credited with kicking off California cuisine - locally grown food cooked expertly to let the flavors of the food shine. I ate there twice while I lived in the Bay Area, and while it seemed like I had a shot at producing similar food in my kitchen, I've never actually tried one of their recipes before. David was their pastry chef for several years, but does not take credit for inventing this recipe.

The crust was easy: mix it, chill it, warm it, pat it into the pan and bake it empty. I questioned the chill it/warm it steps - couldn't I just mix it and pat it? - but I tend to slavishly follow recipes for baked goods and am not a confident crust-maker, so I did as instructed. My baked crust looked great, no serious cracking, but I did take his advice and patched any possible holes with some reserved dough. I also added some height to one of the sides of the tart, as you can see at about 8 o'clock in this picture:
The filling is just cream, sugar, almonds, and a little almond extract. You're supposed to include some amaretto but I seem to have gotten rid of that in my move, so I punted and used Drambuie (which I could not taste in the finished product, for better or worse). Then you bake it. Part of what makes this recipe a little demanding is that you have to break up the setting surface every ten minutes or so, to maintain a smooth appearance. Here it is mid-bake:
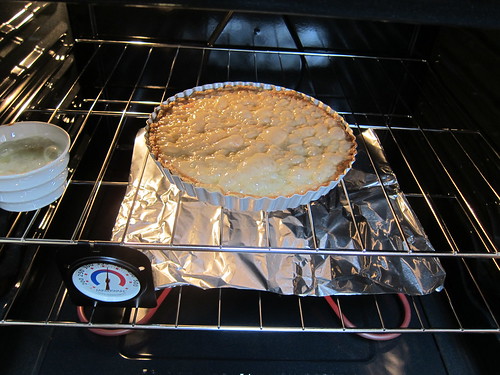
 It was bubbling like MAD! I decided to bake the leftover topping in a ramekin, as you can see - my fatal mistake was not putting foil  under it, because guess which dish bubbled over? Oh yeah. Sorry, new oven!

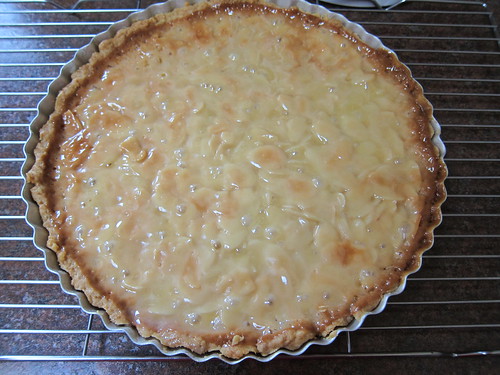
His directions say to bake at 375 and pull it when it looks like coffee with some cream in it - unfortunately I baked it a bit low, and pulled it too soon:
I was getting nervous about the browning edges, and basically just lacked the courage to leave it any longer. I was able to detach the tart from the ring, but was not brave enough to pry it off the bottom of the tart pan (which unfortunately got a little hacked up in the cutting/serving process).

However, it was delicious. I was proud of the amazing flaky crust, and the surface was really perfect, not clotted at all. Next time, I will cook it a bit hotter, leave it in til it's browner, and make a more concerted effort to get it off the tart base. Still: major success!

Tuesday, May 15, 2012

Fresh strawberry scones

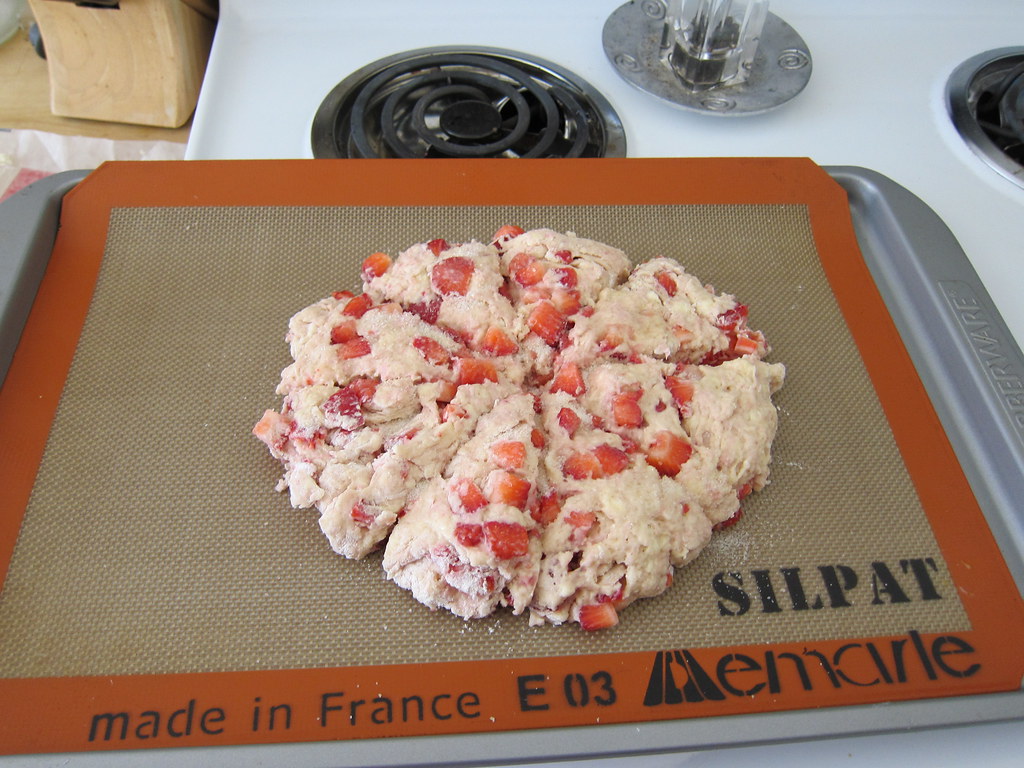
It's late spring and/or early summer, and the produce is amazing! I have already purchased two batches of strawberries (bigger than a pint, smaller than a flat.. what IS that size?), without a plan for either of them. For some reason I decided I needed to make some of them into scones.

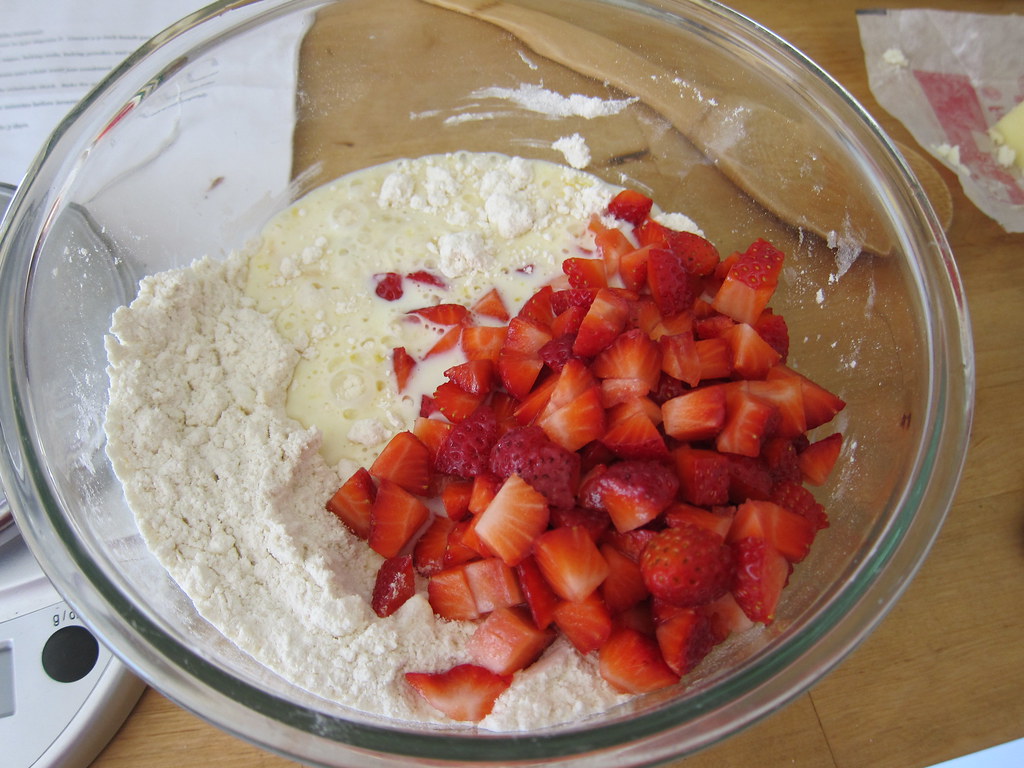
I searched the interwebs for strawberry scone recipes, and wound up going with Orangette's recipe for strawberry Scottish Scones. I liked this recipe the best of the ones I found because it had the least amount of sugar. Let the strawberries shine!

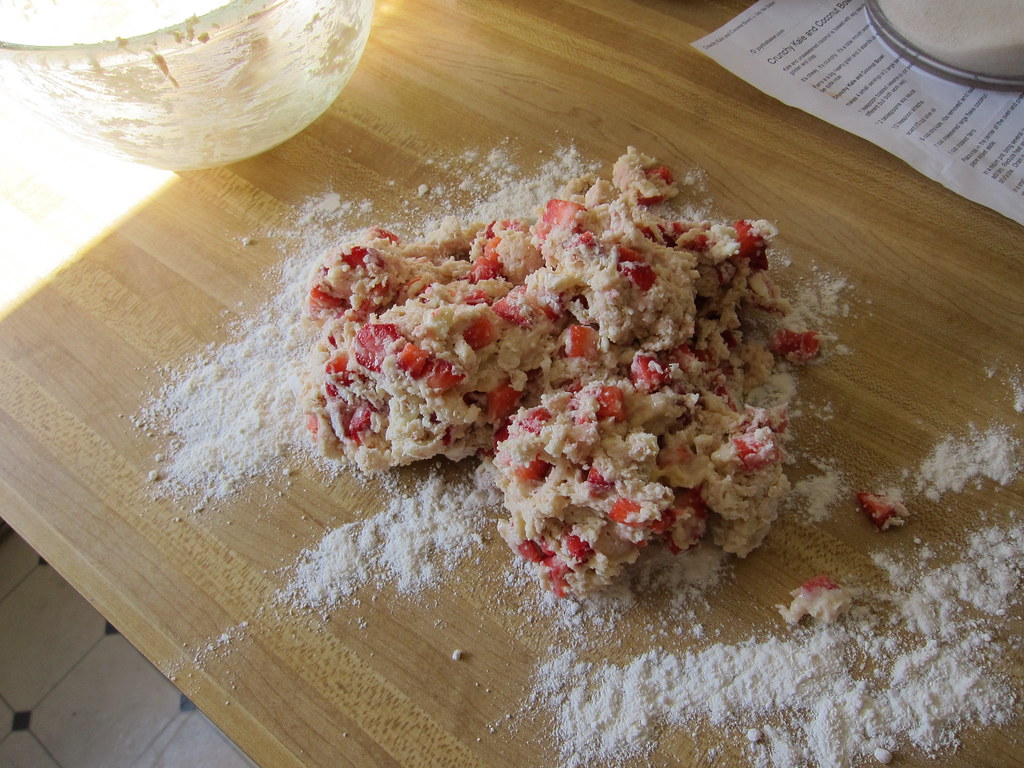
As is my way, I didn't measure the berries and probably had way more than a cup in there. The dough was mega-sticky and I had to add nearly a quarter-cup of flour to get them manageable.

But manage I did, and stuck them in the oven with anticipation.

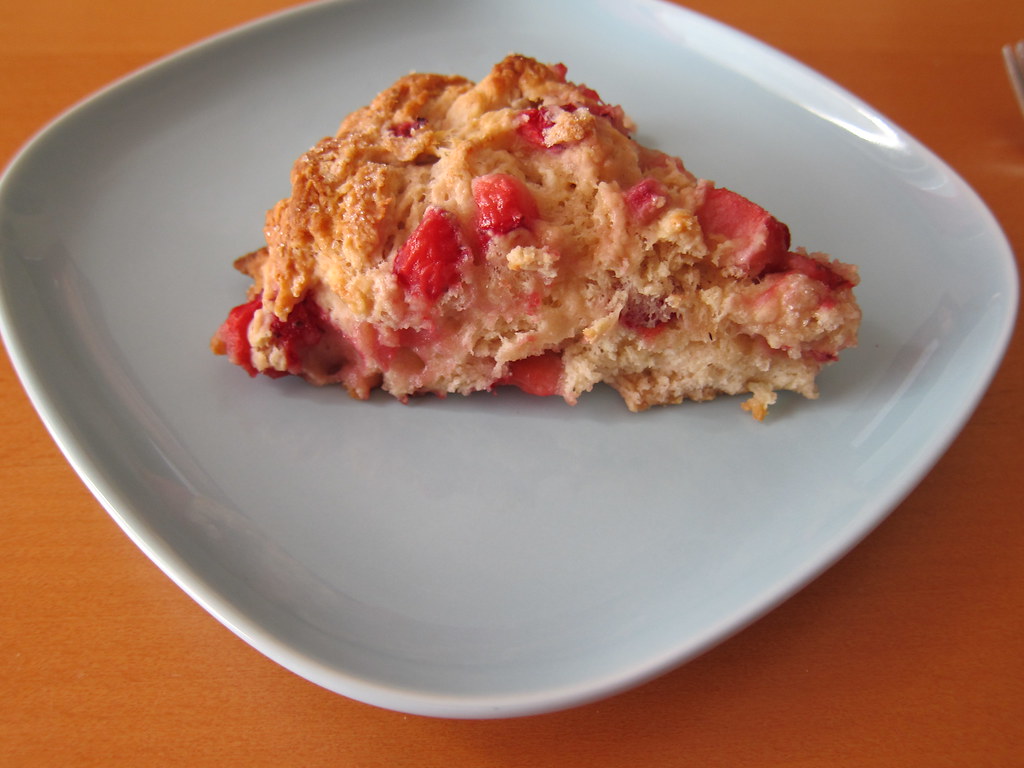
I had to cook them almost twice as long as the recipe dictated. Perhaps I should have separated the wedges when I put them in the oven: near the end of the baking cycle I pulled them apart to help the centers cook.

They were really amazing.

Tuesday, March 20, 2012

Marjolaine, completed! (and notes for next time)

In my last post I showed lots of assembly shots of the dessert I was making. I got the Marjolaine recipe from David Lebovitz' fantastic dessert cookbook Ready for Dessert. I'm not much of a cookbook buyer in this lovely day of online recipes, but I've made several from the book and it's littered with post-its for future reference!

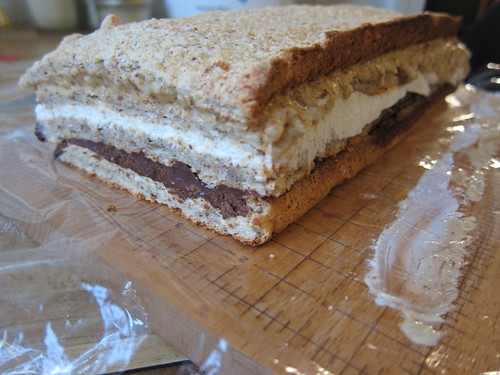
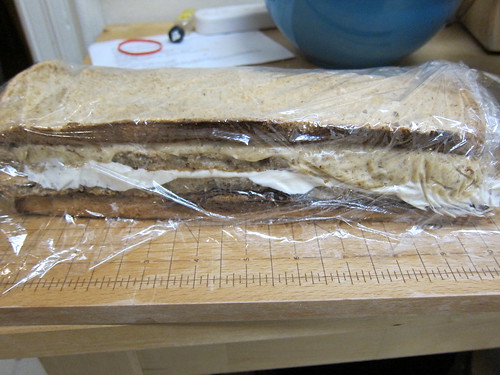
So here is the marjolaine, after 36 hours of refrigerated resting:
You can't tell very well from my careful photography, but it's decidedly tilty. I'm not sure how I would improve that next time - perhaps trim the cake better before stacking.

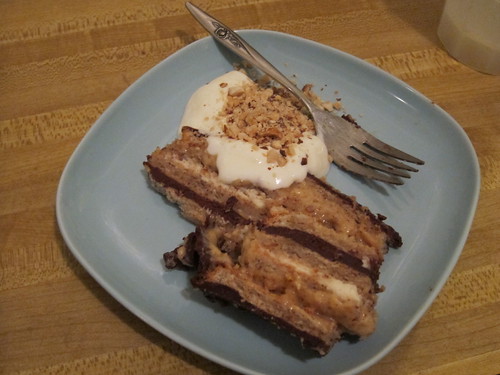
Here is the final product:
That's actually a slice and a half, because it was all that was leftover and I am a piggy. If you just look at the longest rectangle shape in the center of the plate, that's what the marjolaine looked like. I served it with whipped cream/creme fraiche (whatever was leftover after the baking process: whip the cream, fold in sweetened creme fraiche) and ground toasted almonds & hazelnuts, since those were the nuts used in the cake layers.

It was fantastic. The wine group members loved it, and one said the result was on par with things her dad (a master German baker) produces - high praise indeed!

For future reference:
  • It really is easy, and is best if you take 3 days to do the various bits. Starting on Sunday for a Friday reveal was perfect.
  • I am not very skilled at caramelizing sugar (used to make the praline, used in the top layer). That was by far the most difficult step and I probably could have gone a bit darker, but got too nervous. Next time try to go just a trifle longer. 
  • I might make the ganache in two batches next time - 1/3 for the cake layer, and the other 2/3 for the frosting. Reheating the ganache was not easy and its texture was a tiny bit off. 
  • I used Guittard 72% bittersweet chocolate, because I thought the whole dessert would be quite sweet and wanted to offset it a bit. However I didn't love it mixed with the tartness of the creme fraiche, so next time I'll go a shade lighter with 61% semisweet. My local shop sells it for $10/pound which is the best price for the high-end chocolates I've found. I would also consider getting one of Trader Joe's big ol' pound-plus and chopping it up, but the discs in the Guittard box are very handy to work with.
  • The trickiest layer to work with was the vanilla creme fraiche - the white layer in the middle. It was pretty runny, so I would work a bit harder to get it thickened and might consider researching additives like cornstarch or gelatin or cream of tartar to try to get it to stiffen better. Once it was refrigerated it was pretty good, but it was not easy to stack & wrap without the goo sliding out every which way.
  • I would trim the edges of the cake before assembling to try to limit the tilt factor
  • OR next time I'll cover the layers side by side, then stack & wrap quickly. That might be the easiest solution, actually. 
  • I made this with a gluten-intolerant friend in mind - the only thing I had to modify was using corn starch on the parchment paper, instead of flour. The recipe itself is naturally gluten-free. 
  • Next time I'll try making my own creme fraiche - apparently you just put some buttermilk into heavy cream, but that is a LOT cheaper than buying it already soured/thickened.
  • The ingredients for the dessert ran about $25 - definitely the most expensive thing I've made.
To sum up: if you have time and patience, tackle the marjolaine! It's totally worth it.

Thursday, March 8, 2012

Works in progress: sweater, marjolaine

This week has been a weird juggling-of-project bits.
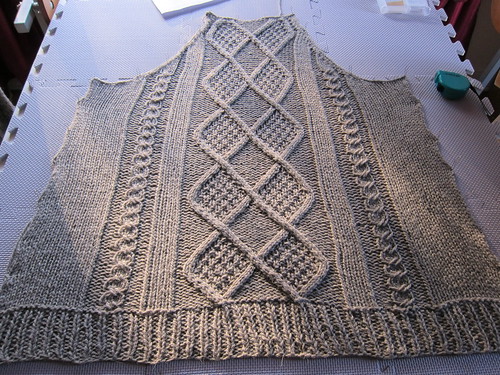
I'm finally wrapping up the sweater. Since I wasn't smart enough to wash and block the pieces as I finished them, and since my drying mat is only so big, I started with washing and blocking the arms on Sunday, then the back on Monday night, and the front panels on Wednesday evening.

I'm also working on a semi-complicated layered dessert called a marjolaine. On Sunday I made the praline (caramelized sugar and toasted/chopped nuts).
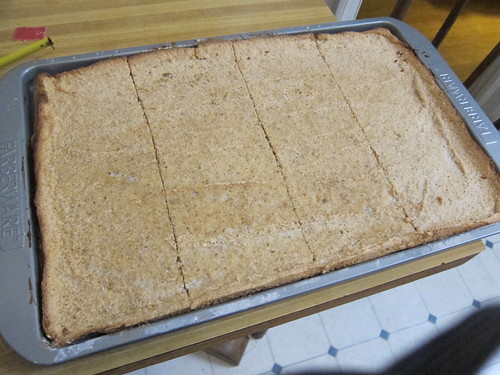
 On Tuesday night I made the meringue - it's more like a cake than the puffy cookies, with egg white, sugar, corn starch, and ground nuts. You bake it in a long thin sheet, so you can cut it into four sections for layering later.
Last night I made the ganache,
and the vanilla cream (some of which I used to make the praline cream for another layer, but evidently forgot to photograph it):
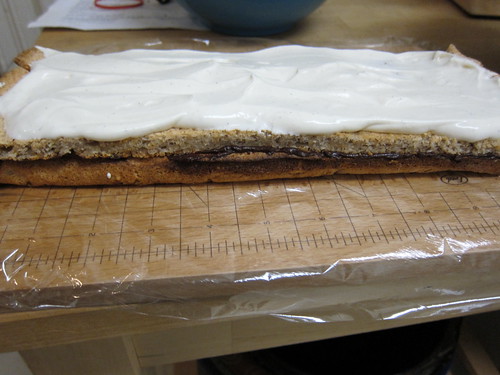
Then it was time to assemble:
layer of meringue/cake, layer of ganache; layer of cake, layer of vanilla cream:
And finally another layer of cake, a layer of praline cream, and a final cap of cake:
Some of the layers were a bit runny, so I had to quickly wrap it and get it in the fridge. The flavors should some together a bit, and I HOPE the creams will firm up. On Friday after work I'm supposed to frost it with the rest of the ganache and serve at room temperature.

The recipe is from David Lebovitz' excellent cook book Ready for Dessert. He had NO pictures so I relied upon the internet. My fingers are crossed it come out - though I'm fully confident it'll taste great!

Oh, and at some point I'll seam the sweater. It would be nifty to wear it to wine group on Friday but I'm not optimistic I can hold still long enough to do all the sewing tonight.

Sunday, January 8, 2012

Cupcakes for Jess!
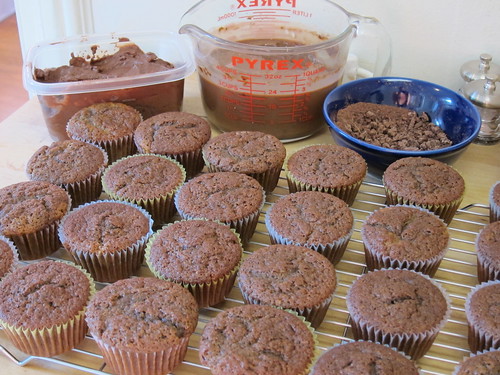
I helped organize a memorial for a friend today - she was sick for a long time, and her family will have a formal service for her later in the month a few hours from here. But we wanted to do something locally for the people who knew and loved her.

Jess didn't always have a lot of energy, but in 2009/2010 she put together a blog focusing on the cupcakes she created. It was called Have Another Cupcake which was so apt! It was sheer torture to see the plate of cupcakes at her desk, and I bet few people had only one.

When we were planning the memorial several of us said we'd bring cupcakes, and I picked her When the Levee Breaks cupcakes. She was following the Iron Cupcake SF group, and around that time they chose music as a theme. You can read the rest of the story on her blog post with the recipe.

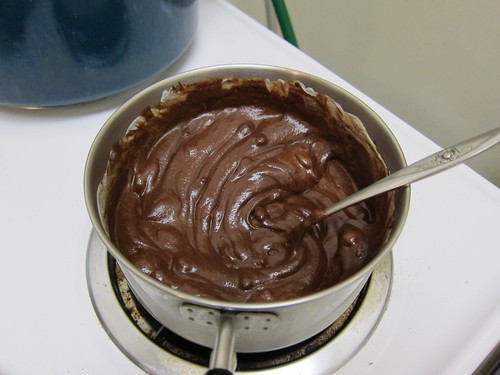
These pictures are of the assembly - I'd already made cupcakes, chocolate pudding, chocolate buttercream frosting, and chocolate cookie crumbs. (Jess didn't supply a frosting recipe so I used one from Joy the Baker.)
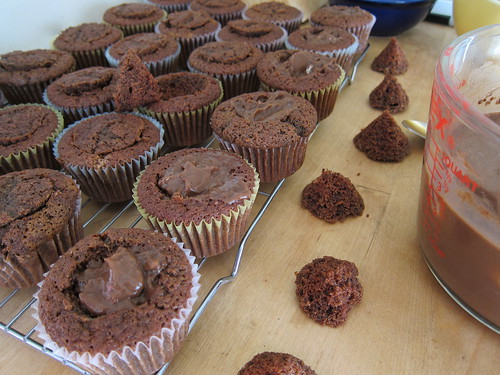
To get the pudding in the cupcake, you cut a cone out of each cupcake, and fill the hole with pudding. Then you trim the pointy bit off the cone (converting it into a cap!) and cover up the pudding.
Finally, you frost. Holy moly, amateur alert! I'd never tried doing anything fancy with the frosting bag & tips I got for my birthday. I have a LOT to learn about frosting.
Some strategically sprinkled crumbs helped quite a bit:

And, of course, they were eaten with alacrity. There were four types of cupcake on offer so I think Jessica would have been pleased!
 Thanks Jess. We had a party for you today.

Tuesday, November 15, 2011

International bundt day!!!

Mary the food librarian is at it again: It's International Bundt Day and yes, she likes big bundts! As it happens, so do I!

This is my third year participating; in 2009 I invented ginger-pear bundt. In 2010 I made Mexican hot chocolate bundt.

This year I played it simple: Spice cake with brown butter/vanilla glaze and yes, that frosting really did make the cake. It was greeted with much admiration and delight!
Do all bakers criticize their products? I thought the flavor was great but the crumb was too dense. I think I overmixed it. Still, it was delicious and I had no leftovers, so I couldn't critique it very carefully!

You'll find the recipe here.

Friday, September 23, 2011

Recipe Review, or: That's right, I'm a genius

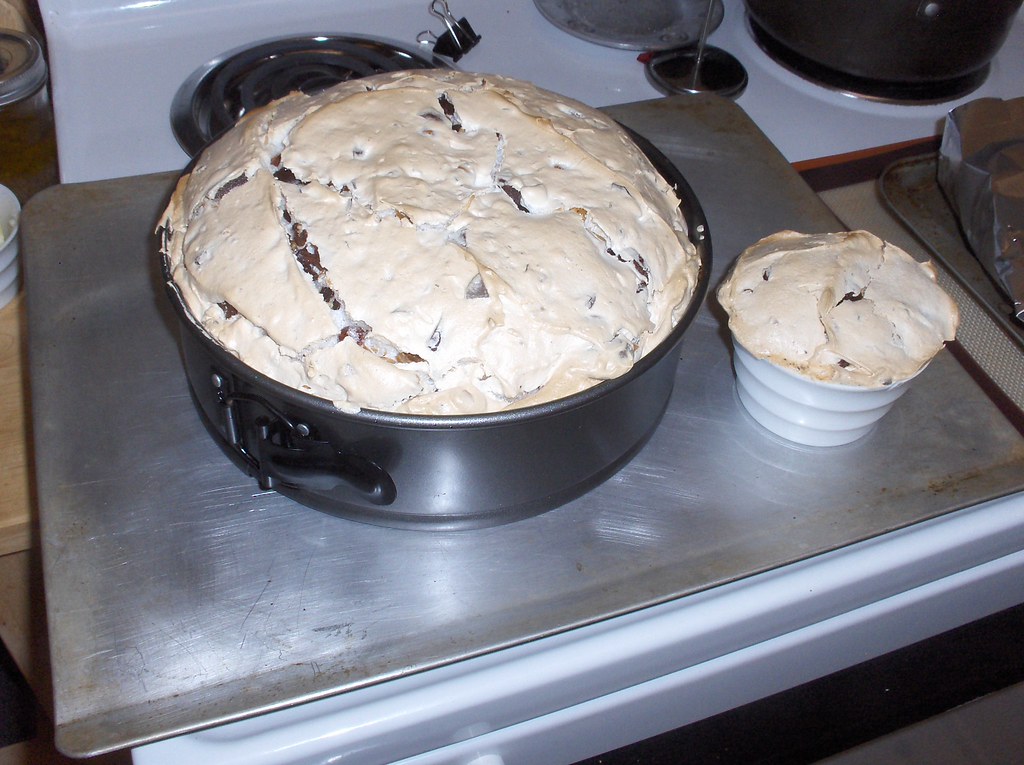
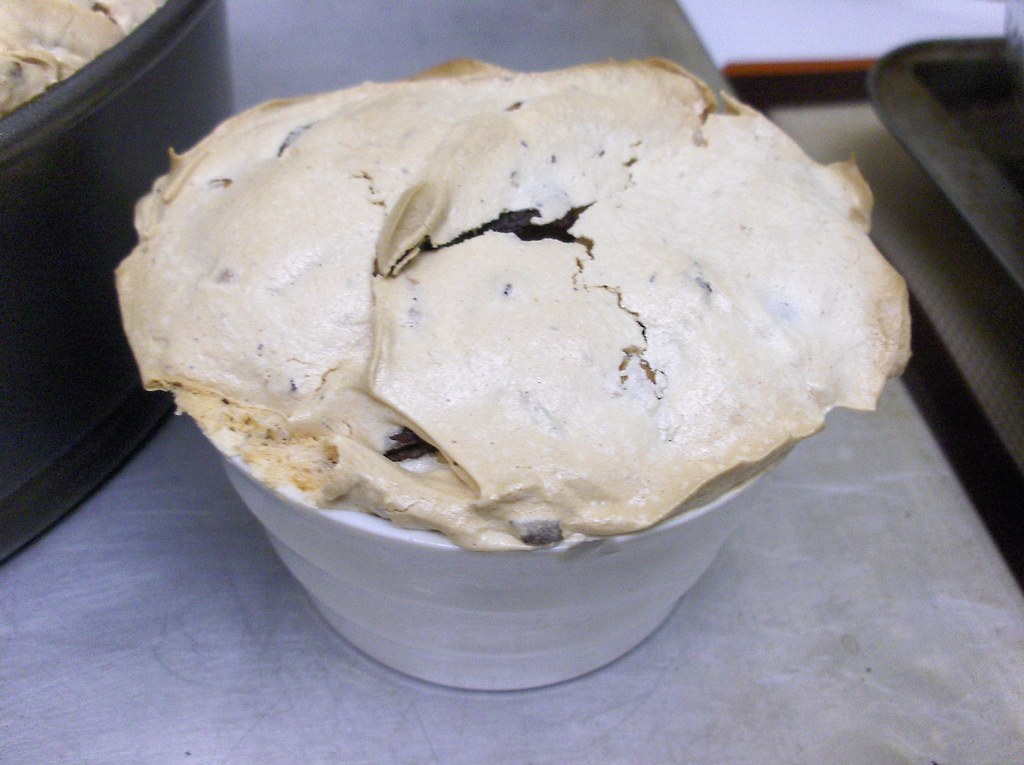
In August I made Tartelette's Chocolate Hazelnut Meringue cake.

The thing I love about baking is this: if you follow the directions carefully, usually it comes out okay. In this case it came out MORE than okay: I made it for my wine group and received several raves a week later.

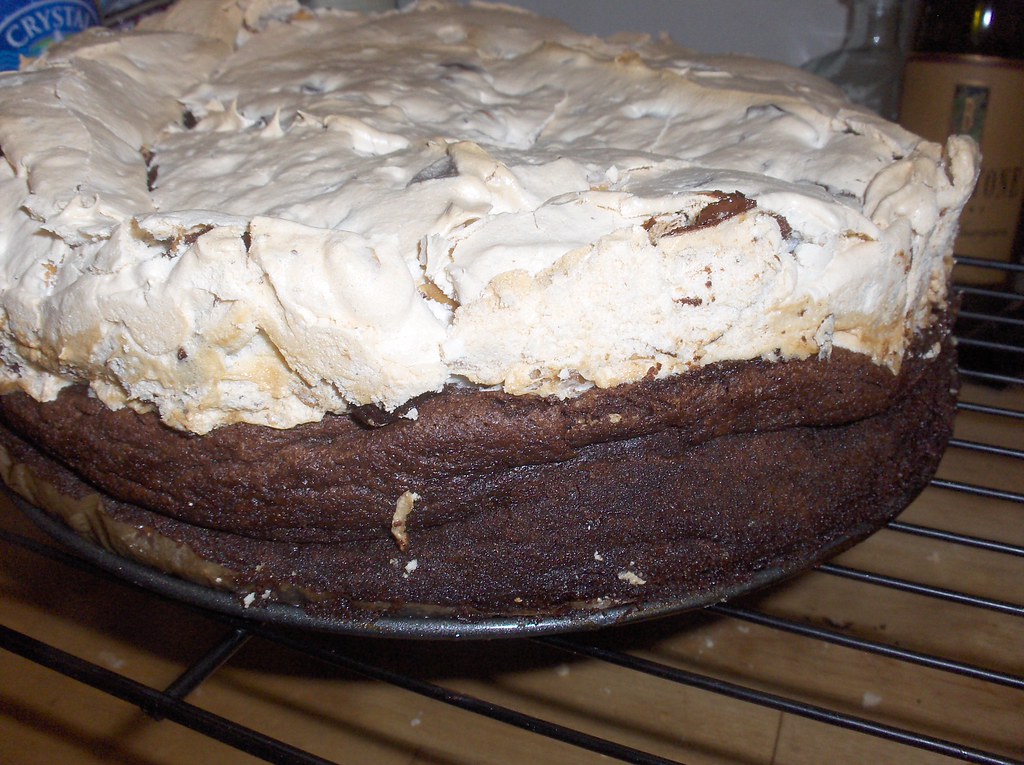
The recipe has you make a chocolate cake, bake it for 20 minutes, add meringue, and bake for about 20 minutes more. My only fault is that I didn't realize how sturdy the meringue is - when I pulled the cake out, it was puffed up nearly to the top of the pan, and I thought I had to contain the meringue within the walls of the pan, so I purposely thumped the pan a few times to deflate the baking cake. It tasted fine, but it looked a bit slumpy on the sides:

So next time I'll have greater faith in the power of meringue to stand up without the help of the pan walls. Either that or I'll make all individuals next time - this sample came out great!

Monday, September 5, 2011

recipes: birthday cake

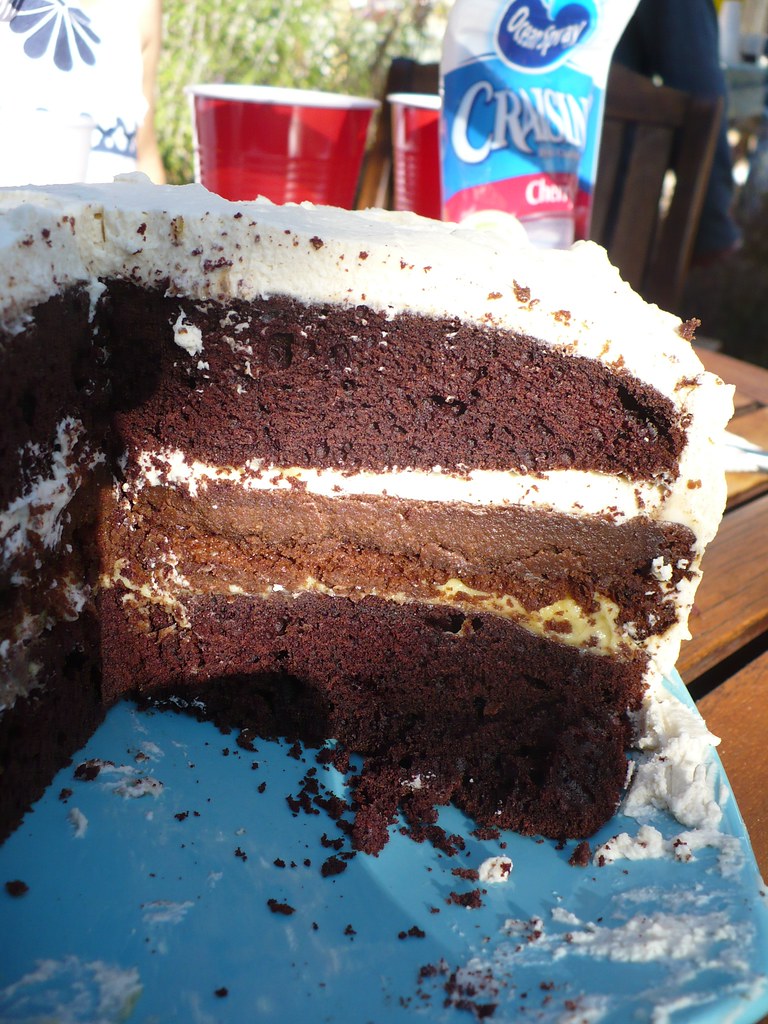
Belated, I know, but wow did I make a great cake for my birthday party! Look at it in all its lopsided beauty!
I was inspired by a post on Sprouted Kitchen; when a friend offered to host a birthday BBQ I told her I really did want to bring myself a cake since it's fun for me to bake it.

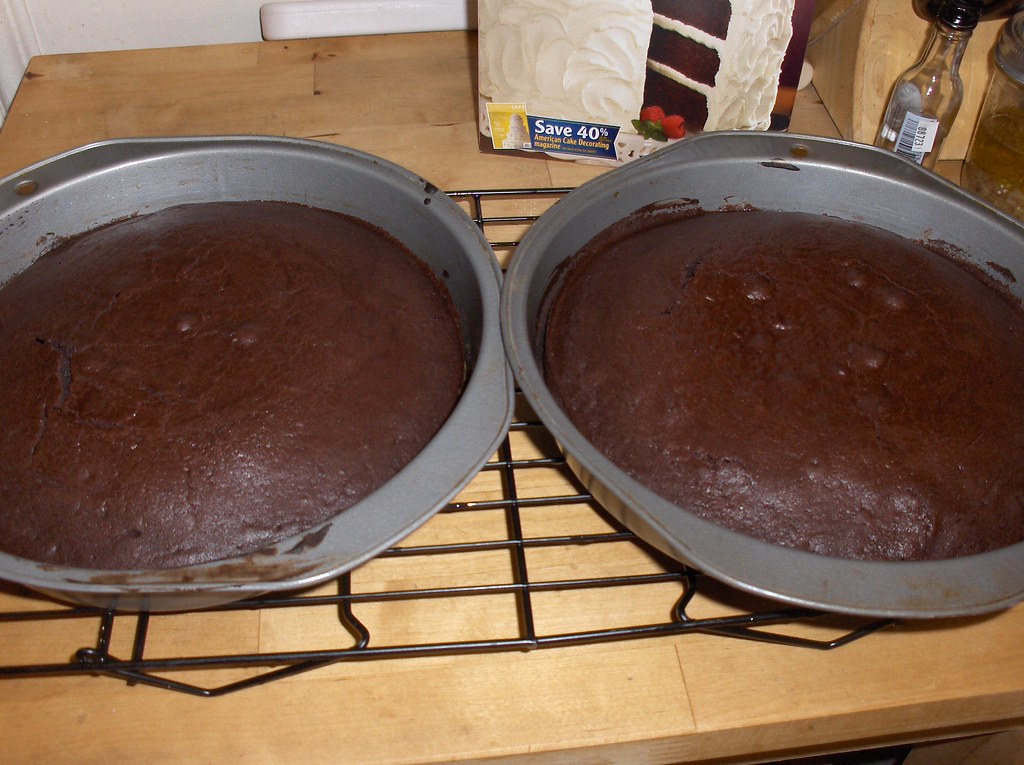
The top and bottom layers are from David Lebovitz' excellent cookbook Ready for Dessert - except he said it didn't matter if you used Dutch process cocoa or not, and I swear mine didn't rise AT ALL. In the photo above, you can see that the top layer (which is upside down) did rise some in the middle, but was pretty skinny on the edges. Here are the cakes before and after baking:


See? Can't see any rising action. Drat. So I decided rather than have a short (but flavorful!) cake, I'd make a third layer. I opted to make a flourless cake for the middle, and baked some of the batter in a ramekin for a friend who can't eat gluten - double win! I used a flourless chocolate cake recipe found in some cookbook or other (sheesh, I swear I thought I was paying better attention) and was ready to go:

On the left, the (slightly charred...but delicious!) flourless cake; middle and right are the regular-flour cakes. The one on the blue plate shows just how woefully short they were. The jar is full of pastry cream, which is basically thick vanilla pudding, adapted from this recipe - I opted to use the lesser amount of sugar and greater amount of flour, as I wanted it quite thick but not very sweet.

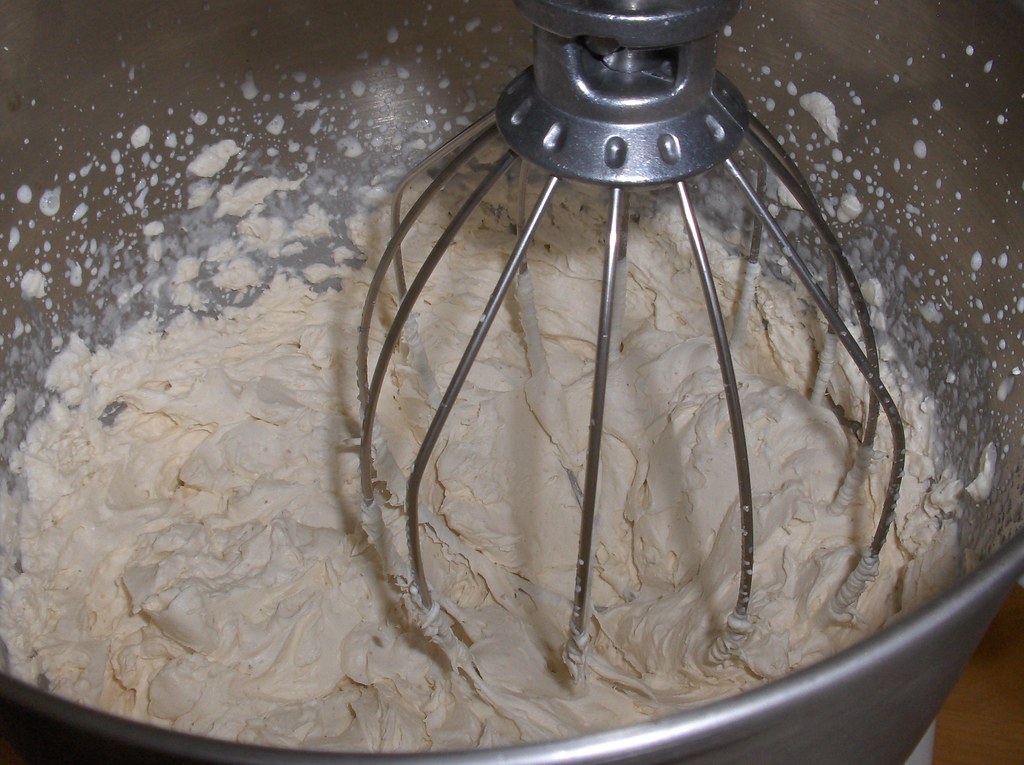
Okay so we have cake, cake, cake, and pastry cream - all that was left was frosting. Shockingly, I used the frosting that came from the original blog post that was my inspiration - the mascarpone/whipping cream frosting sounded too decadent to miss! Plus it gave me an excuse to use my beloved KitchenAid mixer.
An added bonus was that the frosting didn't have any flour or other gluten-giving ingredients in it, so I was able to frost the flourless cake in the ramekin for my friend. Maybe dessert isn't as important to her as it is to me, but I would really be grumpy if I went to a party and couldn't eat any of the desserts on offer!

All in all the cake came out great. There was lots of focused silence while people consumed it - and there was a goodly amount leftover for me to share at work the next day. If I can figure out the leavening issue (and I really do know I should have paid closer attention) this combination is a keeper!

*** Edited to add links to the cake recipes:
The two layers of chocolate cake came from David Lebovitz' devil's food cake recipe
The flourless chocolate cake came from Ezra Poundcake

Monday, August 29, 2011

Recipe: Birthday muffins!

It was my birthday last week (yay!) and I made plans to go to Yosemite with some friends. I had my birthday-morning free and wasn't working, so I whipped up some muffins to bring along.

I used the crumble topping from 101 Cookbooks' Oatmeal Muffins - as she warned, the ingredients for the crumble make more than double what you need for those muffins, and in fact I still have a bit of the topping in my freezer. Therefore if you want to make just enough for one batch, I recommend the following proportions:

1 oz / 27 g flour
5 oz / 15 g rolled oats
.8 oz / 22 g natural cane or brown sugar
pinch fine grain sea salt
.8 oz / 22 g unsalted butter, melted

After you've melted the butter, stir in the rest, and scrape the resulting rather firm goo into a flat patty and freeze a bit. I think the idea is that it's then easier to break it up into bits to put on the top of the muffin batter - but I had to hack at it since I froze it too hard. So, be advised.

The muffins were based on the genius recipe called Muffin Madness in the invaluable cookbook Moosewood Restaurant Cooks At Home. Then I modified it - of course.

Combine:
2 large eggs
1/4 c vegetable oil
1/4 c plain  yogurt
3/4 cup or a bit less brown sugar
1/2 tsp or a bit more vanilla extract (I used vanilla paste because I lurve it)

In another bowl, mix together:
2 c flour
1 tsp baking powder
1/2 tsp salt

Stir the dry into the wet. Then add:
about a half-cup or so pitted sour cherries
about a half-cup or so toasted almonds - I buy them already chopped somewhat roughly. In fact they look about like cherry pits which can be a bit disconcerting as you chomp into the muffin.

Pour the batter into muffin cups - makes about 12. Be sure to top with some of the crumble topping! Bake at 350 for 20 or so minutes.

Saturday, February 19, 2011

I am the mistress of waffles!

...or at least I made some really yummy ones today. I bought a waffle maker after Christmas and was surprised to learn they're not as easy as my mom's always-delicious offerings led me to believe. I knew they had to be eaten immediately but didn't realize how soggy they could become, and so quickly!

So I've been experimenting a bit. My base recipe is from good 'ol Better Homes & Gardens - that cookbook is a staple on my shelf. I've halved their recipe because even that makes more than I can eat in a morning. I tend to freeze the rest and toast them over the next week or so. (I've had toasted waffles for dinner on more than one occasion!)

Anyway that recipe was a good base but I wanted some ideas for making the waffles a bit more crisp. I did some poking around and tried some techniques this morning with good success. There's still more tweaking to be done (and they still got soggy when they cooled!) but I am well on my way to being a Waffle Star.


Rainy weekend waffles
Turn on the waffle maker when you start combining ingredients, so it's ready to go when the batter is.

In one bowl, combine the dry ingredients:
3/4 c flour
1/8 c corn starch
1 1/2 tsp baking powder*

In another bowl, combine the liquid ingredients:
5/6 c milk **
1/4 c vegetable oil
1 tsp vanilla ***

In still another bowl (no, I do NOT have a dishwasher), whisk vigorously until frothy (you can come back to it after you rest):
3 T egg whites ****
[or, separate one egg, use the white here, and add the yolk to the other liquid ingredients, above]
1 T sugar

Add the liquid ingredients to the dry ones - stir gently until it's only somewhat lumpy. Gently stir in the egg white/sugar mixture. Make your waffles - they are still best when extremely fresh off the iron, so don't be shy about digging in!

* After reading David Lebovitz's post about non-aluminum baking powder, and because I've often detected trace bitterness when I use a recipe that relies upon it for leavening, I now use Rumford aluminum-free baking powder. You may call me Princess.

** I confess I rarely have milk on hand - it's more often half & half for coffee or sometimes whole milk for tea, and I usually don't want to use all of it up in a recipe. As a result, I am rather cavalier with this bit. Today I used some half & half, some milk, and some water - just  make sure the liquid measure is right.

*** I impulsively bought vanilla bean paste at the Bowl a while back, so I tend to use this instead. If I were a scientist I might do side-by-side waffle tastings, but I'm not the Doctor of Waffles, I am the Mistress of them, so I don't have to do things like that.

**** I happen to have a bajillion egg whites in my fridge (okay, 9) after a recent pot de creme episode.